Showing posts with label vegetables. Show all posts

22 October 2015

Chicken Cacciatore with Basmati Rice

Chicken Cacciatore is an Italian dish that many of you have probably heard of or tasted. The word "cacciatore" means “hunter” and this dish originated in the Renaissance period when only the wealthy could afford to enjoy the sport of hunting and subsequent poultry that was caught. It's a dish that has many variations, and this is my Thermomix version.
 
Great as a quick mid-week meal, it's usually one enjoyed by the whole family - even if some persist in picking out elements! I've presented it here with Basmati Rice but that can be substituted with some fresh bread to mop up all the yummy sauce. I hope you enjoy it :)
 
 
Chicken Cacciatore with Basmati Rice
 
Serves 4-5
 
400g Basmati rice
500g skinless chicken thighs, trimmed of excess fat and diced
3 cloves garlic
1 red capsicum, deseeded and chopped roughly
20g olive oil
400g can of crushed tomatoes
6-8 basil leaves
3-4 sprigs of parsley
1 tablespoon of TM vegetable/chicken stock
60g white wine
2 small-medium carrots, sliced
130g mushrooms, sliced
100g Spanish olives, sliced or whole and pitted
Salt and pepper to taste
 
1. Fill Thermomix bowl with approximately a litre of water.
 
2. Place rice in Thermomix basket and rinse for a few minutes under running water. Then place basket inside bowl. Cook for 20 minutes at 100 degrees/speed 4.
 
3. When rice is finished cooking, remove basket carefully and spoon rice into Thermo Server, fluffing with fork so as to separate grains. Set aside with lid on while you cook the chicken.
 
4. Place garlic and capsicum into Thermomix bowl and chop 3 seconds/speed 7.
 
5. Add 20g oil and sauté for 2 minutes at 90 degrees/speed 1.
 
6. Add chicken, crushed tomatoes, basil, parsley, stock, wine and carrots to the bowl and cook for 20 minutes on reverse at 100 degrees on soft speed (spoon symbol).
 
7. Place mushrooms into bowl and cook for 7 minutes on reverse at 100 degrees on soft speed.
 
8. Finally, add olives and cook for a final 1 minute on reverse at 100 degrees on soft speed.
 
9. Dish out rice on to individual plates and then spoon chicken cacciatore beside it or on top, however you prefer it.

30 July 2014

Mini Mexican Empanadas

These mini empanadas are great as part of a Mexican feast, and make for great party food no matter the theme. I've had the recipe for many years and am not sure of its origins.

You can cut the pastry into larger pieces and hence make fewer but larger empanadas if you wish.

The empanadas in the foreground, pictured with Old El Paso's Stand 'n' Stuff Tortillas.

Mini Mexican Empanadas

Makes approx 36

Olive oil
250g beef mince
1 small onion, chopped finely
1 clove garlic, crushed
1/2 teaspoon chilli powder
1 small green capsicum, diced finely
200g tinned tomatoes (or 200g homemade Italian tomato sauce)
1/4 cup water
1 beef stock cube (or 1/2 teaspoon Thermomix vegetable stock)
150g tinned red kidney beans
Salt and pepper to taste
4 sheets of puff pastry (I use Pampas)
Egg for glazing

1. Brown the beef mince in a saucepan, using a little olive oil, ensuring that all lumps are broken up.

2. Add onion and cook until tender. 

3. Add garlic and chilli powder and cook for a further minute, stirring all ingredients together. You can add more chilli powder if you like your empanadas hot.

4. Add capsicum and tomatoes/tomato sauce and mix well.

5. Dissolve stock cube or vegetable stock in the water and then add to saucepan, along with salt and pepper to taste. Bring mixture to the boil and then reduce heat, letting it simmer gently for about 30 minutes with the lid on.

6. Remove lid and let mixture continue to simmer gently for a further 15 minutes. Then set aside to cool.

7. Once mixture is cooled, add your kidney beans and mix them in.

8. Cut each pastry sheet into 9 small squares.

9. Take one square at a time, add approximately a teaspoon of the mixture to the centre, glaze edges of pastry with beaten egg, then fold in half so that you have a triangular shape. I then use the back of a fork to press the edges together.

10. Place triangles on a lined baking tray and bake in a 180 degree Celsius fan forced oven for about 20 minutes or until puffed up and golden brown. Alternatively, you can deep fry the empanadas but I prefer oven baked for this recipe.


17 June 2014

Minestrone con Lenticchie e Fagioli (Vegetable Soup with Lentils & Beans)

Sydney's cold spell called for an old favourite - Minestrone con Lenticchie. Minestrone is a traditional Italian vegetable soup that usually includes rice or pasta. You can mix this recipe up as much or as little as you like. Add more, less or different vegetables. Add rice instead of pasta. Add beans instead of lentils. The combinations are endless, but you are guaranteed a delicious and hearty soup that is the perfect comfort food on a cold winter's night. My boy's weren't overly keen on this dish, however in their own words, they "struggle with vegetables" lol! My husband and I loved it and there was plenty for lunch leftovers which is always a bonus! Next time, I think I'll add extra lentils and make it even thicker :)


Minestrone con Lenticchie

Serves 6-8

1 clove garlic, crushed
2 potatoes, chopped into small cubes
2-3 baby carrots, sliced thinly
1 stalk of celery, sliced
3-4 silver beet spinach leaves, sliced/shredded
Light olive oil
1 cup dry green lentils, pre-soaked for approx. 2 hours
3/4 x 400g tin Borlotti Beans
2 tablespoons tomato paste/homemade tomato sauce
1 vegetable stock cube/vegetable paste
Approx 3.5 litres of water
250g short pasta
Salt and pepper
Parmesan cheese (optional)

1. Place garlic and chopped vegetables in a large saucepan. Add a dash of olive oil and stir over medium heat for a few minutes so that vegetables become coated in oil and the smell of garlic starts to permeate.

2. Add drained lentils to the saucepan, along with tomato paste and crushed stock cube. I use vegetable stock paste made in the Thermomix. My current batch is quite salty so I put less than I normally would.

3. Fill saucepan with water (approximately 3.5 litres) and bring to the boil.

4. Once the soup is boiling, turn down the heat and let it simmer gently for at least 1 hour. The longer it is left, the better it tastes.


5. Add pasta along with salt and pepper to taste. Cook until pasta is to your liking.

6. Garnish with a  drizzle of oil and some shaved Parmesan. It's delicious served with some crusty bread!


12 June 2014

Pasta e Broccoli

Most Italians, or at least Southern Italians, will recognise this traditional dish - pasta e broccoli (pasta and broccoli). As a child, you either loved it or hated it. As an adult, you will love the simplicity of this dish and the amount of time it takes to cook (it's very quick). My children all eat it, but best of all, my youngest and fussiest child eats it every time! Hallelujah!
 
 
Pasta e Broccoli
 
Serves 4-6
 
1-2 heads of broccoli
1-2 potatoes
300g spaghetti
oil
salt and pepper
Parmesan cheese (optional)
 
 
1. Clean broccoli and chop up into small pieces. I usually discard the thicker parts of the stem. Apparently, the florets are packed with the most nutrients anyway so this is okay. The florets cook the fastest, and that is why I prefer to just use them and not the thicker stems. However, there is no reason you can't include the stems.
 
2. Peel and chop potatoes into small bite size pieces.
 
3. Place broccoli and potatoes in a saucepan with water. Ensure the saucepan is large enough to also cook the pasta in. Place on stove top on high and bring to the boil. Leave it boil for at least 10 minutes so that the potatoes and broccoli become half cooked.
 
4. Meanwhile, break or snap your spaghetti into 2-3cm pieces. You don't need to be precise, so long as they are short enough to be picked up with a spoon. You can buy spaghetti already cut into smaller pieces but sometimes it's therapeutic to stand there snapping pasta!


The snapped pasta
5. Add the pasta to the half cooked broccoli and potatoes. Season with salt and pepper and add a touch of olive oil. Continue boiling until the pasta is cooked to your liking.
 
6. Then, simply dish out ready for eating. It is lovely served with fresh grated Parmesan on top.
 
 
Notes:
 
Some people mash the broccoli and potatoes up completely before adding the pasta. I have done this in the past when my children refused to eat broccoli, but I'm now able to leave it a little more intact :)
 
Amounts of pasta and other ingredients are easily adjustable and will depend on how many adults/children are eating and whether you are having this dish as a meal on its own or as a starter.
 
Are you familiar with this dish? Do you make it in a different way?


5 June 2014

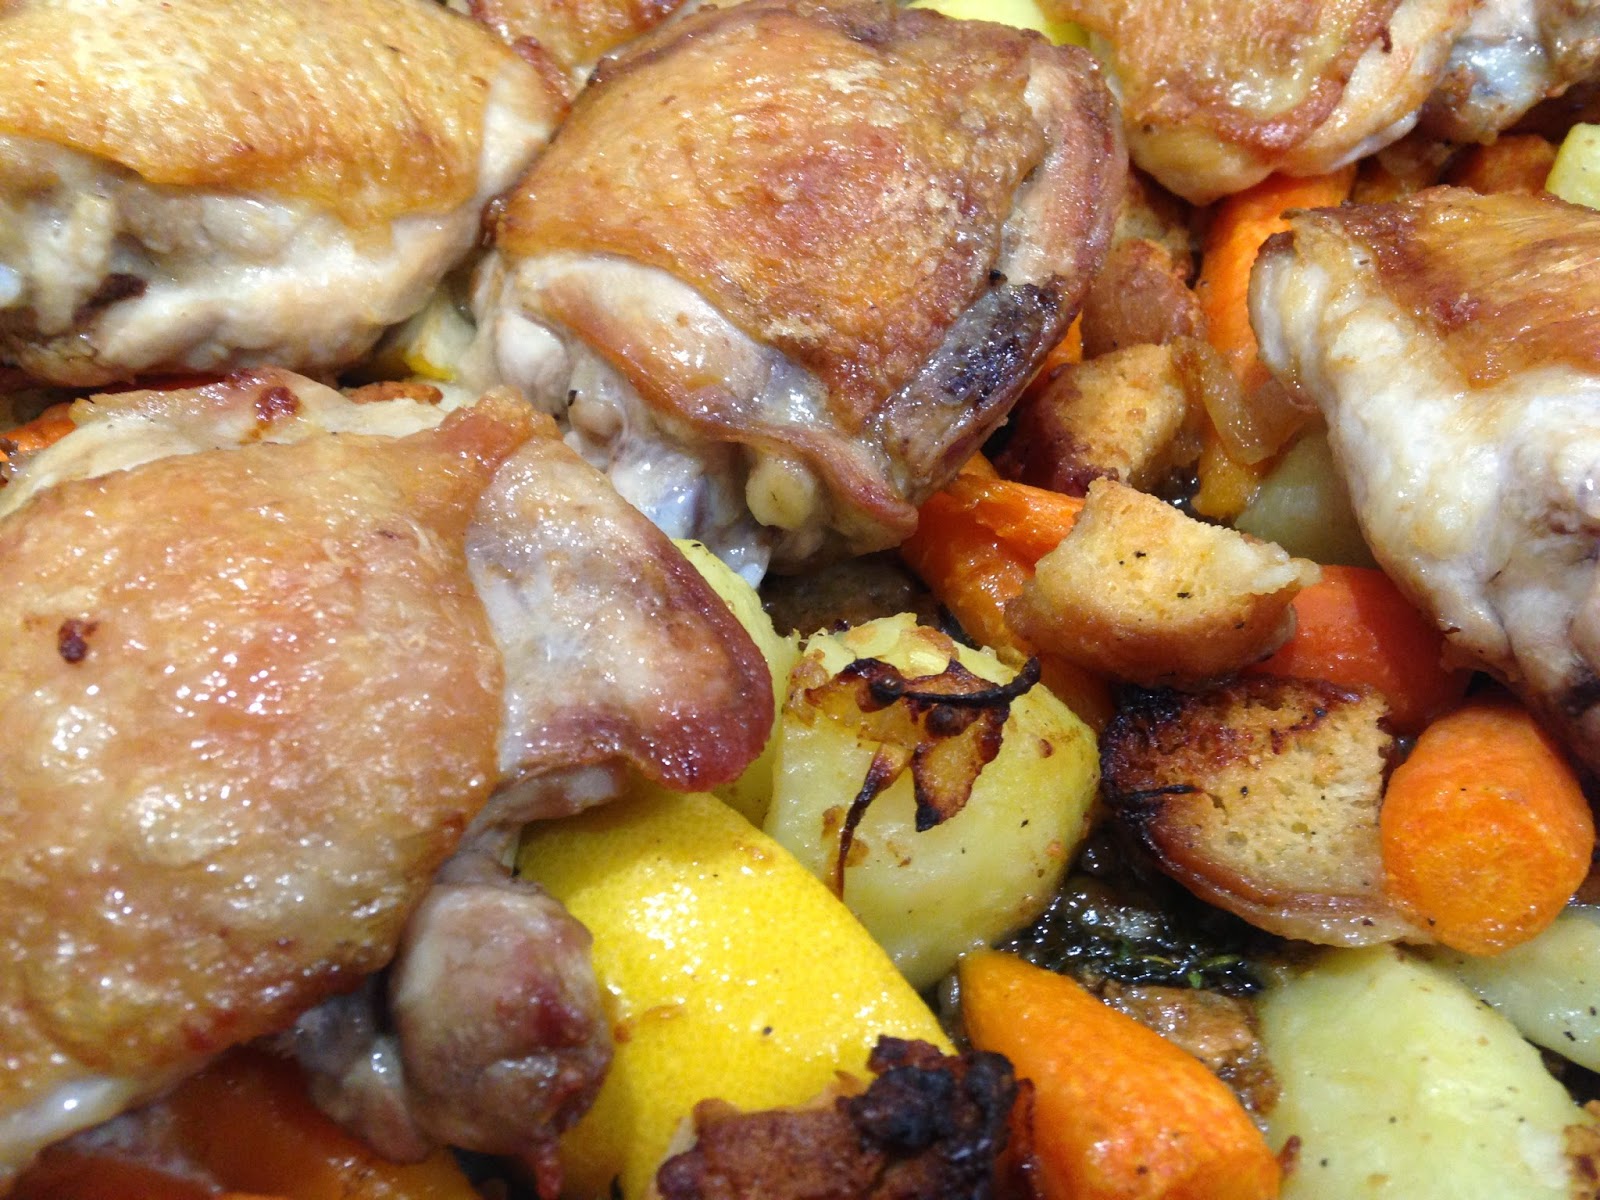
Lemon-Scented Crispy Chicken Thighs

I made this dish for the first time last night and it was an all-round winner! Probably not something that you would cook every week due to the fat content, but definitely a delicious addition to the family favourites menu. My advice would be to prep everything first so you can then enjoy putting it all together. Don't do what I did and try to prep as you go - that just results in chaos! Somehow I still managed to pull it off and everyone loved it. I was worried about the bread component of the dish, and thought I would get lots of complaints about it, but that actually turned out to be everyone's favourite part! This recipe is adapted from Kelsey Nixon's dish.


Lemon-Scented Crispy Chicken Thighs


3 mini brioche burger buns, cut up into cubes*
300-400g small potatoes, halved, either scrubbed or peeled
olive oil
6-8 chicken thighs on the bone, skin on
Sea salt & freshly cracked black pepper
1 large brown onion, sliced
6 cloves of garlic, peeled and crushed
300-400g baby carrots, either scrubbed or peeled
2 lemons, cut into wedges
Few sprigs of fresh thyme

* The original recipe called for half a baguette to be used, however I forgot to buy one so used the brioche buns instead which were awesome. I think any crusty bread would work in this dish.

1. Preheat oven to 160 degrees Celsius/ 140 degrees fan forced.

2. Place the cubed bread on a lined tray and bake for 10 minutes to dry it out. Set aside once done.

3. Boil the potatoes for 10 or so minutes to tenderise them a little. I threw mine in the Thermomix's Varoma for 20 minutes at Speed 1. Set aside once done.

4. Turn the oven temperature up to 220 degrees Celsius/ 200 degrees fan forced.

5. Add a thin layer of olive oil to a large oven proof dish and place it on the stove to heat up.

6. Sprinkle the chicken thighs with salt and pepper and add to the pan, skin side down. Cook until browned (about 5 minutes). Then turn each thigh over and cook for a few minutes more.

7. Once browned, remove thighs from pan and set aside. Leave oil/juices in the pan.

8. Add onions to pan, sprinkle with a little salt and cook for a couple of minutes. I cooked mine until slightly browned. Then add crushed garlic and cook for a further minute. Don't be scared off by the amount of garlic in this dish - it really isn't overpowering at all.

9. Add the reserved bread, potatoes and carrots (I used Chantenay baby carrots) and sprinkle with just a little salt and pepper.

10. Add the lemon wedges and thyme and if need be a little extra oil.

11. Arrange reserved thighs on top and place in the oven until cooked - about 20 minutes.
 

Enjoy!
Let me know what you think of this dish once you try it :)