I don't know many people who don't like spinach dip. It always seems to be a winner at parties, and I've heard more than one person declare that they could just sit there and eat the entire bowl. I'm definitely in the fan category and so I have tried many different versions of this dip. This is my friend Geni's recipe and I can honestly say it is by far my favourite version of spinach dip! I see people devouring other spinach dips, and I think "you really need to try Geni's version!" This dip can be eaten cold but oh my goodness, when served warm, it is heavenly! So, without further ado, here is Geni's Spinach Dip!
Geni's Spinach Dip
Butter (I use a couple of good sized chunks)
2 small onions, chopped finely
2 packets of frozen spinach, defrosted (or fresh spinach, chopped finely)
1 packet of French Onion soup mix
1 packet of Spring Vegetables soup mix
2 cartons sour cream
1 cob bread
Extra bread (optional)*
* If it's a large party, I sometimes buy an extra cob bread or some bread rolls so that there is extra dipping bread available :)
1. Fry onions in a saucepan with the butter until soft and opaque.
2. Add spinach and stir until all broken up and mixed with onions and butter.
3. Sprinkle the packets of French Onion and Spring Vegetable soups over the spinach and stir to combine.
4. Pour in the sour cream and mix to combine. Bring to the boil and then let simmer for a minute or two.
5. In the meantime, cut off the top of the cob bread and pull out the centre crumb in the base, leaving a thick enough shell to serve your dip from.
6. Chop the top of the cob bread and the centre crumb part into bite size pieces and place around the base in an oven proof dish.
7. Pour the dip into the cob bread base and then place dish in a preheated oven (150-180 degrees Celsius) until bread and dip are slightly toasted or beginning to brown.
8. Remove from oven and allow to cool slightly before serving. Enjoy :)
24 November 2015
6 November 2015
Chocolate Cheesecake Truffles
These truffles are a rich, indulgent treat and perfect for Christmas gifts, although they do need to be kept refrigerated because of the cream cheese. I have been making these for a number of years and I upped the chocolate ante with this recipe by adding Nutella. They are always a winner with those who have a sweet tooth :) Even better, the recipe is super easy!
There are a number of possible variations and I have listed some of these at the end of the page. The chocolate coated ones are particularly rich, so you may like to make smaller versions of this type. The quantity will obviously depend on the size of each truffle.
If you are a chocoholic or just looking for a good hit of chocolate, this is the recipe for you! They are more chocolatey than cheesecake tasting, so if you are a fan of chocolate but not cheesecakes, still give them a try!
Chocolate Cheesecake Truffles
Makes approx. 20
500g (2 packs) Arnotts Choc Ripple biscuits
250g pack of Philadelphia Cream Cheese
100g Nutella
200g dark chocolate (optional)
Crushed, mixed nuts (optional)
Dessicated coconut (optional)
1. Place Choc Ripple biscuits in Thermomix and blitz for 10 seconds, speed 7. This will result in a crumb mixture. Biscuits can be crushed in a food processor or by rolling pin if you don't have a Thermomix.
2. Add cream cheese and mix for 20 seconds, speed 6. If using a food processor, mix until well combined.
3. Add Nutella and mix for a further 15 seconds, speed 5 or until well combined.
4. Roll mixture into balls and set out on a lined baking tray. Once completed, place tray in freezer for an hour or so until truffles become firm. The freezer part is more important if you are planning to coat with chocolate. If you are just going to use the coconut, half an hour in the fridge is plenty.
5. If coating with chocolate, melt your chocolate and then work as quickly as possible before it hardens. Picking up each truffle with a skewer, dip into melted chocolate and then place into a small truffle/cupcake case. Sprinkle with crushed nuts.
6. If coating with coconut, simply roll truffles in a plate of coconut and place in cases.
7. Refrigerate until ready to eat and then enjoy :)
See variations to recipe at end of page.
Variations to Recipe
* Nutella can be omitted for a slightly less rich truffle.
* Choc Ripple biscuits can be substituted with Oreos.
* White or milk chocolate can be used instead of dark. I've used all three before and sometimes it's nice to see the contrast of the filling with the white chocolate.
* Anything can be used as a garnish. Here I used crushed macadamia and pistachio nuts. You can use a different type of nut, crushed candy or swirls of chocolate in contrasting colour to name a few.
22 October 2015
Chicken Cacciatore with Basmati Rice
Chicken Cacciatore is an Italian dish that many of you have probably heard of or tasted. The word "cacciatore" means “hunter” and this dish originated in the Renaissance period when only the wealthy could afford to enjoy the sport of hunting and subsequent poultry that was caught. It's a dish that has many variations, and this is my Thermomix version.
Great as a quick mid-week meal, it's usually one enjoyed by the whole family - even if some persist in picking out elements! I've presented it here with Basmati Rice but that can be substituted with some fresh bread to mop up all the yummy sauce. I hope you enjoy it :)
Chicken Cacciatore with Basmati Rice
Serves 4-5
400g Basmati rice
500g skinless chicken thighs, trimmed of excess fat and diced
3 cloves garlic
1 red capsicum, deseeded and chopped roughly
20g olive oil
400g can of crushed tomatoes
6-8 basil leaves
3-4 sprigs of parsley
1 tablespoon of TM vegetable/chicken stock
60g white wine
2 small-medium carrots, sliced
130g mushrooms, sliced
100g Spanish olives, sliced or whole and pitted
Salt and pepper to taste
1. Fill Thermomix bowl with approximately a litre of water.
2. Place rice in Thermomix basket and rinse for a few minutes under running water. Then place basket inside bowl. Cook for 20 minutes at 100 degrees/speed 4.
3. When rice is finished cooking, remove basket carefully and spoon rice into Thermo Server, fluffing with fork so as to separate grains. Set aside with lid on while you cook the chicken.
4. Place garlic and capsicum into Thermomix bowl and chop 3 seconds/speed 7.
5. Add 20g oil and sauté for 2 minutes at 90 degrees/speed 1.
6. Add chicken, crushed tomatoes, basil, parsley, stock, wine and carrots to the bowl and cook for 20 minutes on reverse at 100 degrees on soft speed (spoon symbol).
7. Place mushrooms into bowl and cook for 7 minutes on reverse at 100 degrees on soft speed.
8. Finally, add olives and cook for a final 1 minute on reverse at 100 degrees on soft speed.
9. Dish out rice on to individual plates and then spoon chicken cacciatore beside it or on top, however you prefer it.
19 October 2015
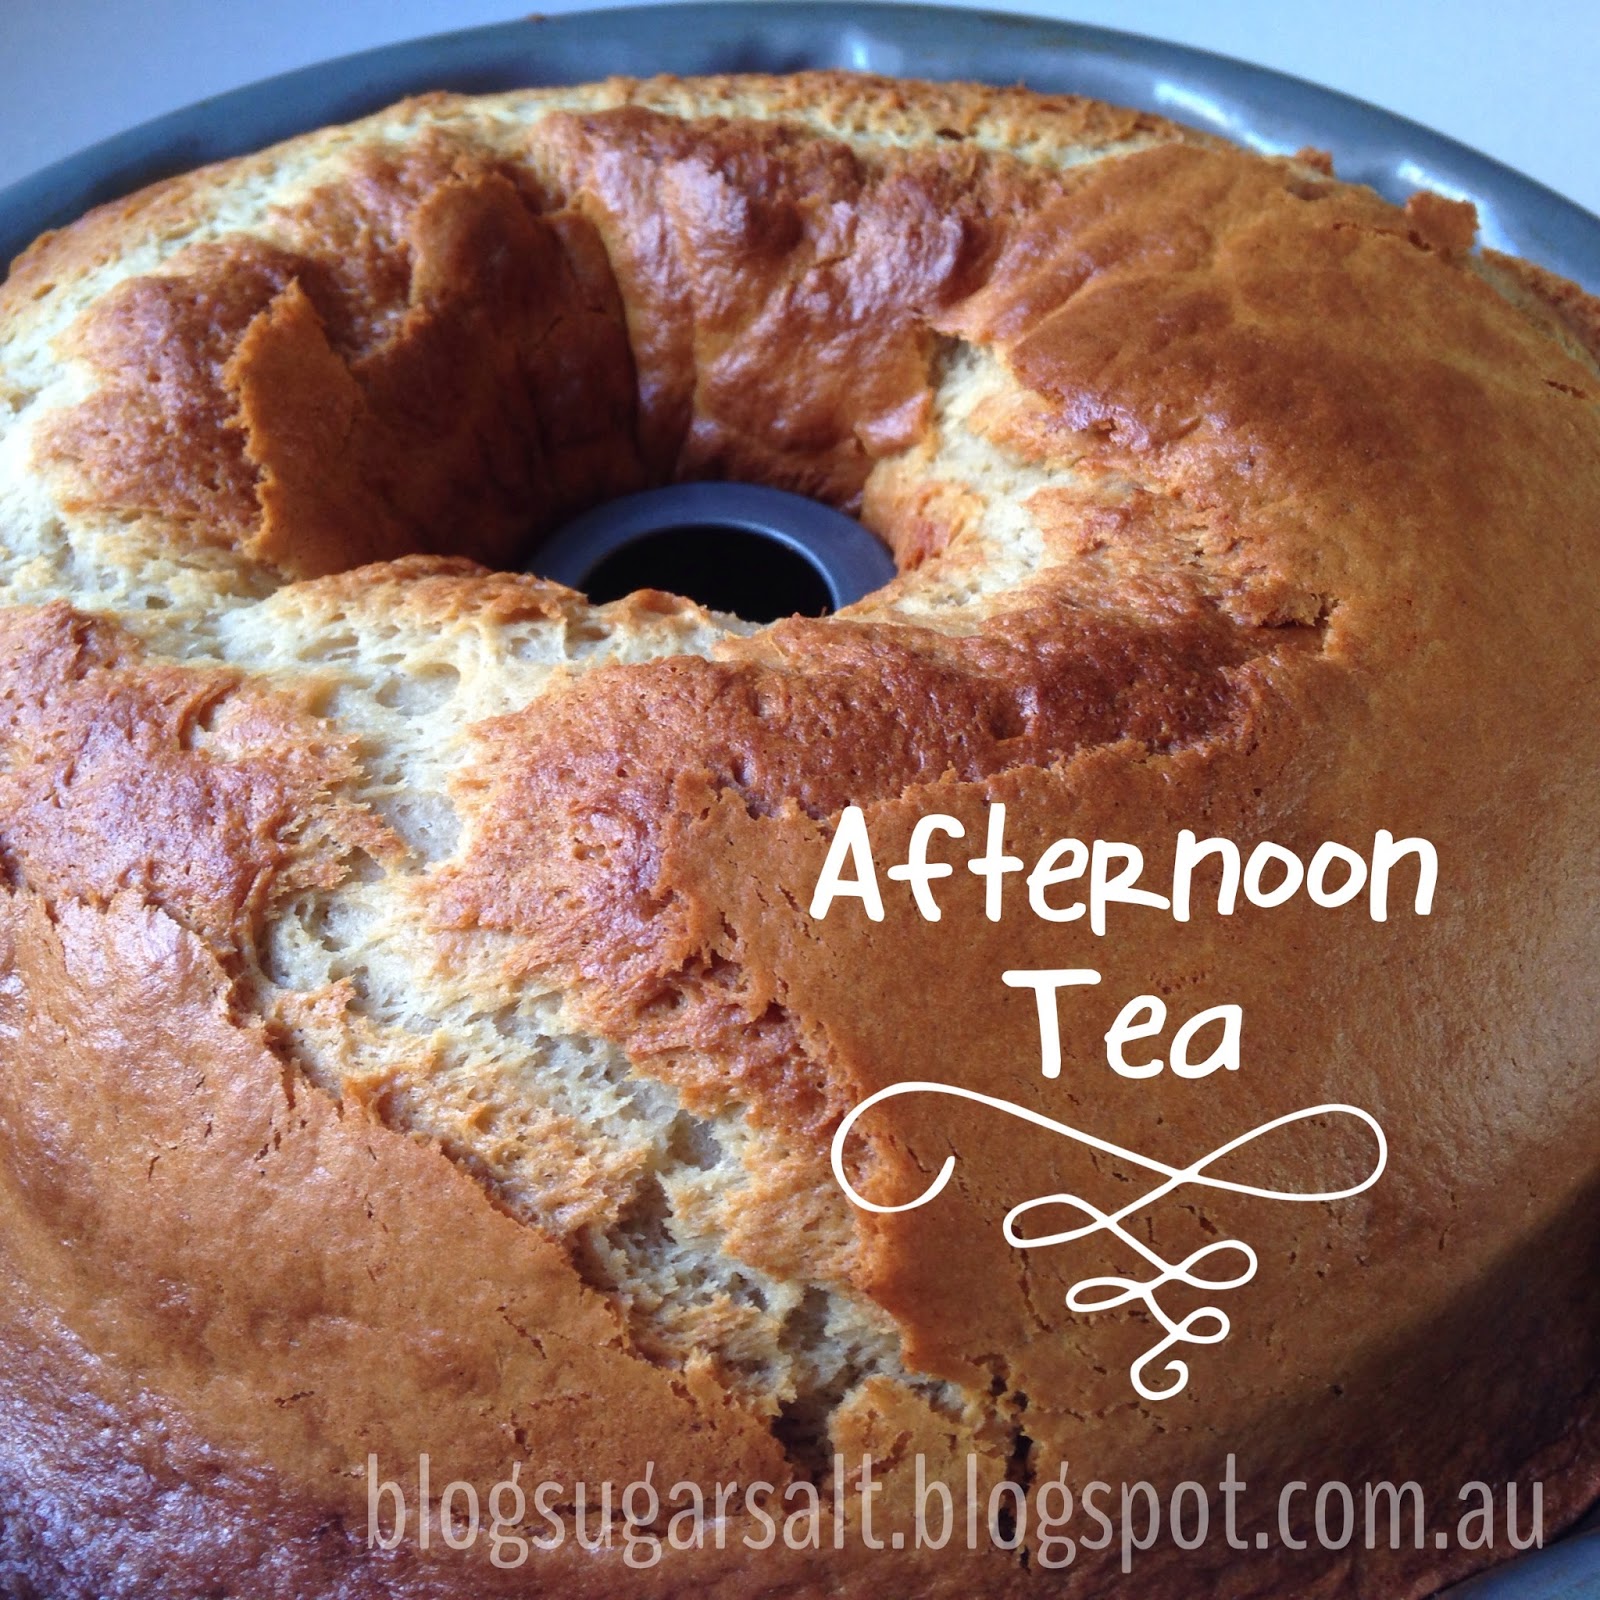
Best Ever Banana Cake
I have been meaning to share this recipe for so long, that when I finally sat down to write this blog post, I discovered hundreds of banana cake photos on my computer! Every time I would bake this cake, I would take photos. I still don't think I have the perfect photo - the one that captures how wonderful this cake really is.
However, once you know the history of this cake, you'll realise that's a near impossible task. For this cake is tied up with a thousand childhood memories. The recipe was handed down from my paternal grandmother to my mum and aunties, and has now also been passed on to my mother in-law and beyond. I really don't know where it originated but I remember my Nonna and mum baking it - and quite frankly, it's the best banana cake I have ever, ever tasted!
You see, I hate bananas. I can't stand banana flavoured food of any sort and detest the smell of bananas. The only way I'll consume bananas is via banana cake or banana bread - and that's all thanks to this one cake.
I seem to make it every time I glance at the fruit bowl and discover a few over ripe bananas. The batter is quite large in quantity so I always bake it in a large bundt tin, however, you can also split the batter and make two smaller cakes. If you do this, don't forget to adjust the cooking time. It can be frozen either whole or in individual slices as well, however I love it fresh and so do the kids. It's also one of those cakes that really doesn't need a topping. Sometimes I sprinkle some icing sugar on top but it isn't necessary.
Both traditional recipe and adapted thermomix recipe is included below. Quantities in grams are for the thermomix.
Best Ever Banana Cake
2-3 over ripe bananas (approx. 180g total)
3 cups (490g) self raising flour
1 1/2 teaspoons bi-carb soda
1 cup (210g) caster sugar
2/3 cup (140g) milk
3/4 cup (120g) olive oil
3 large eggs
1 1/2 teaspoons vanilla essence
Thermomix version
1. Preheat oven to 160 degrees fan forced.
2. Place bananas in TM bowl and mix for 10 seconds/speed 5. Scrape down sides.
3. Add flour, bi carb soda and sugar to the bowl. Mix for 20 seconds/speed 4.
4. Add milk, oil, eggs and vanilla essence to bowl and mix for 20 seconds/speed 5. Scrape down sides and mix for a further 10 seconds/speed 5.
5. Pour batter into a large greased bundt tin and bake for approximately 40 minutes or until an inserted skewer comes out clean.
6. Let cake rest in tin for 10 minutes then turn out onto a wire rack to cool.
Traditional version
1. Preheat oven to 160 degrees fan forced.
2. Mash bananas with a fork and place them in mixing bowl.
3. Sift flour and bi carb soda into same bowl as bananas, then add the caster sugar. Beat together until combined.
4. Add milk, oil, eggs and vanilla essence and mix until well combined, scraping down sides of bowl to make sure all ingredients are well incorporated.
5. Pour batter into a large greased bundt tin and bake for approximately 40 minutes or until an inserted skewer comes out clean.
6. Let cake rest in tin for 10 minutes then turn out onto a wire rack to cool.
27 April 2015
Jumble Biscuits
This is an old recipe that I remember my aunty making and she passed it on to me. It's probably an old Women's Weekly recipe but I can't find the original source. They are not brownies, despite looking a little like them. They have a chewy, biscuity texture. My aunty always called them Jumble Biscuits, so despite being more akin to a slice, I also call them Jumble Biscuits.
In any case, they are not only delicious but also super easy and quick to make! You can mix everything in one bowl with a wooden spoon and don't even need to take out your mixer. It's one of my go to desserts when I need to take a plate.
Jumble Biscuits
Makes approx. 48 (size 4 x 4cm)*
2 cups self raising flour
4 tablespoons cocoa
pinch of salt
1 1/2 cups sugar (white or caster)
2 cups desiccated coconut
180g butter, melted
2 teaspoons vanilla essence
2 eggs
200g cooking chocolate
extra desiccated coconut to sprinkle on top
* Obviously, you will get less slices if cutting into bigger pieces
1. Preheat oven to 180 degrees Celsius fan forced.
2. Combine all dry ingredients in a bowl and mix well.
3. Add butter, vanilla essence and eggs and mix again until all ingredients are fully combined. I like to do this by hand. At first it may seem like there is not enough liquid to incorporate all the dry ingredients but trust me, it's just perfect - you don't need to add anything! Just keep kneading it together by hand until it's all combined.
4. Place mixture on to a lined/oiled baking tray and using your hands, flatten until the mixture is evenly spread. I use a baking tray that measures approximately 35.5cm x 25cm.
| This is the mixture, all flattened in the baking tray. |
6. Remove from oven and allow to sit for about 10 minutes. There may be sections of the slice that look like they have risen more than other parts - almost like a giant air bubble. Don't worry about this, as any such section will deflate to be level with other parts once out of oven.
| The cooked biscuit/slice. |
8. Sprinkle extra coconut on top to decorate.
9. I like to cut it at this stage to avoid cracks in the chocolate. I cut off about half to one centimetre around all edges simply for presentation and then proceed to cut the slab into 4 x 4cm pieces, wiping knife down between each cut because the chocolate is still quite runny at this stage.
| Cutting up the Jumble Biscuits. |
| Delicious and ready to eat! |
If you like this recipe, don't forget to share -
you can do so easily using the little button at the end of this post.
24 April 2015
Mini Apple Cinnamon Muffins
The other day I bought my boys some mini cupcakes at the supermarket and one of the flavours was apple. They really weren't that great and I could hardly taste apple in it, which was probably to be expected from a supermarket chain product. I remembered a banana muffin recipe that I had found and made which I had scribbled down in my notebook - the texture of the muffin just lent itself to apple - so I set about recreating it and the result was wonderful. I'm so happy with how these mini muffins turned out. They have a firm top and are deliciously soft in the centre with big chunks of apple through them. Ideal for a morning tea or afternoon snack, I promise you they won't last long!
You don't even need a mixer for this recipe but for those wanting to use their Thermomix, I've included separate instructions.
8. For the coating, place white sugar and cinnamon in a small dish and stir well to combine.
9. Taking care with the hot muffins, take each one and place face down into the dish with the cinnamon sugar. The moisture still present from the heat will be enough for the sugar to stick. If there are any small dips that miss out on sugar using this method, once turned upright, spoon a bit of sugar on top and then turn to shake off excess.
8. For the coating, place white sugar and cinnamon in a small dish and stir well to combine.
9. Taking care with the hot muffins, take each one and place face down into the dish with the cinnamon sugar. The moisture still present from the heat will be enough for the sugar to stick. If there are any small dips that miss out on sugar using this method, once turned upright, spoon a bit of sugar on top and then turn to shake off excess.
You don't even need a mixer for this recipe but for those wanting to use their Thermomix, I've included separate instructions.
Mini Apple Cinnamon Muffins
Makes approx. 15
1/2 400g tin pie fruit apple slices
1 3/4 cups plain flour
1 tablespoon baking powder
4 teaspoons cinnamon
1 teaspoon nutmeg
pinch of salt/sea salt
1 1/2 cups white sugar
1/2 cup coconut oil, melted
1/2 cup milk
1/4 cup brown sugar, lightly packed
1 tablespoon vanilla essence
Cinnamon Sugar Coating
1/4 cup caster sugar
1 teaspoon cinnamon
1. Preheat oven to 180 degrees Celsius fan forced.
2. Combine flour, baking powder, cinnamon, nutmeg and salt in a medium size bowl and set aside.
3. In a separate bowl, combine white sugar, coconut oil, milk, brown sugar and vanilla and whisk for a few minutes or until fully incorporated.
4. Pour wet mixture over dry mixture in first bowl.
5. Add apples on top of mixture and then fold through until both mixtures are fully blended together. You should end up with a dough-like consistency. It won't be runny.
6. Spoon dough mixture into muffin cases - I always use an ice-cream scoop with a "squeeze to empty" mechanism.
7. Bake in pre-heated oven for 20 minutes or until an inserted skewer comes out clean.
| Straight out of the oven. If you prefer your muffins without the extra sweetness of the topping, you can leave them like this. They'll taste just as delicious! |
9. Taking care with the hot muffins, take each one and place face down into the dish with the cinnamon sugar. The moisture still present from the heat will be enough for the sugar to stick. If there are any small dips that miss out on sugar using this method, once turned upright, spoon a bit of sugar on top and then turn to shake off excess.
| Cinnamon Sugar - a wonderful coating to complete these apple muffins. |
Mini Apple Cinnamon Muffins (Thermomix version)
Makes approx. 15
1/2 400g tin pie fruit apple slices
250g plain flour
1 tablespoon baking powder
4 teaspoons cinnamon
1 teaspoon nutmeg
pinch of salt/sea salt
320g white sugar
100g coconut oil
100g milk
40g brown sugar
1 tablespoon vanilla essence
Cinnamon Sugar Coating
1/4 cup caster sugar
1 teaspoon cinnamon
1. Preheat oven to 180 degrees Celsius fan forced.
2. Add flour, baking powder, cinnamon, nutmeg and salt to Thermomix bowl and combine 5 seconds/speed 5. Set aside in a medium size bowl.
3. Spoon coconut oil into Thermomix bowl and melt for 30 seconds/50degrees/speed 4.
4. Attach whisking tool. Add white sugar, milk, brown sugar and vanilla and whisk for 2 minutes/speed 3.5.
4. Pour wet mixture over dry mixture in bowl that was previously set aside.
5. Add apples on top of mixture and then fold through until both mixtures are fully blended together. You should end up with a dough-like consistency. It won't be runny.
6. Spoon dough mixture into muffin cases - I always use an ice-cream scoop with a "squeeze to empty" mechanism.
7. Bake in pre-heated oven for 20 minutes or until an inserted skewer comes out clean.
9. Taking care with the hot muffins, take each one and place face down into the dish with the cinnamon sugar. The moisture still present from the heat will be enough for the sugar to stick. If there are any small dips that miss out on sugar using this method, once turned upright, spoon a bit of sugar on top and then turn to shake off excess.
| Will you be able to stop at just one? |
21 April 2015
Pea and Mushroom Cauliflower "Rice"
Cauliflower "rice" seems to be all the rage at the moment. I see it popping up on all sorts of diet and healthy eating sites, as well as on cooking shows. Basically, it is the use of cauliflower in place of rice - a lower calorie, healthier option for those who don't want to load up on carbs. Whilst I'm definitely a carb fan and could never give up rice entirely, cauliflower rice is a tasty option. Whilst many use it as a plain base for casseroles, I've chosen to add a couple more vegetables. I was going to add a little bacon as well but I forgot to buy it! We had ours as a side dish but it could easily be a great little lunch meal. Likewise, the ingredient quantities are suggestions only - you can adjust everything to your own taste.
| Steamy stove top photo :) |
Serves 4-6 (as a side dish)
1/2 head of cauliflower
200g button mushrooms, chopped into quarters or sixths depending on size
1 cup frozen peas
Couple of handfuls of chopped spring onion
2 tablespoons Olive oil
Salt & pepper to taste
Chilli flakes to taste
1. Clean cauliflower and roughly chop. Place into food processor and process until cauliflower is of a fine, grain-like consistency. Alternatively, you can grate the cauliflower or if you have a Thermomix, grate for about 5 seconds/speed 5-6. Set aside.
| This is how your cauliflower should look after processing/grating. |
2. Heat oil to a medium heat and add peas and mushrooms. Saute until vegetables are softened and starting to brown.
3. Turn up heat and add cauliflower. Mix through well and continue to cook for 3-5 minutes or until cauliflower softens and starts to brown.
4. Add salt, pepper and chilli to taste and stir through.
5. Finally, add spring onions and cook for another minute.
6. Serve immediately and enjoy :)
Subscribe to:
Posts (Atom)