28 December 2014

BLACK by Ezard at The Star, Sydney

 
As you all know, I love to eat...and truth be told, I love to eat out more than I love to cook. Discovering new restaurants with delicious food would have to be one of my favourite hobbies. This was our first visit to BLACK by Ezard, even though it has been a fixture amongst The Star, Sydney's fine eateries since 2011. What took me so long?
 
Part of Teage Ezard's stable of restaurants, BLACK encapsulates the spirit of Sydney - sophisticated yet comfortable. The plush interior with its 30 chef show kitchen is visually appealing and so is the view from many of its tables. We had an early pre-theatre show booking and were seated next to the large windows overlooking the harbour, making not only for an amazing view (and some interesting people watching), but also great lighting for food photography - a rare treat!
 
We started off our dining experience with a complimentary, delicious, warm mini brioche loaf and butter. Surprisingly, we were brought a second loaf after we downed the first...and we just couldn't refuse!
 
Following is a visual feast of the rest of our food. My husband likened these dishes to those at the 6 star Wolgan Valley Resort in terms of presentation. They were pretty amazing in terms of flavour combinations as well. Not surprising, considering BLACK by Ezard was awarded Three Chef's Hats in the 2014 Gault & Millau Sydney Restaurant Guide ​​​​​​​​and One Chef's Hat in the SMH Good Food Guide 2015.
 
We decided to share a couple of starters. The first was the Tomato Vine Ripened Salad which included a variety of tomatoes, buffalo cheese, green kalamata olives, white balsamic and basil dressing. It sounds deceptively simple yet tasted amazing and looked pretty as well. With added mousse, the saltiness of parmesan and the crunch of pine nuts, it delivered as an entrée to a great menu.
 

We also enjoyed the King Prawns with seaweed butter. I can't say that they slid out of their shells effortlessly but they were worth the cutlery struggle. Again, the presentation looked clean and fresh.


We could have chosen something from the wood burning grill for our mains but we couldn't go past the two following dishes! They sounded too good to pass up - and our deal was that we had to share with each other!

I ordered the handmade Potato Gnocchi, which I must say leave mine for dead! They absolutely melt in the mouth and teamed with crispy zucchini flowers, hazelnut dressing and ricotta cheese, they are undeniably delicious. I would never think to add whole hazelnuts to a gnocchi dish but the nutty flavour worked so well with the ricotta and zucchini flowers. I found myself scraping the bottom of the plate with my fork, trying not to leave any drop of deliciousness behind. I highly recommend this stunning dish.


Anyone who knows me, knows I can't go past a delicious sounding pork dish - which is exactly why I convinced my husband to order it hehe... I must admit that when it first arrived at the table, it wasn't what I was expecting. I wasn't sure how tender the pork would be but one mouthful and I was in heaven. The Spice Crusted Pork Tenderloin was teamed with blood plum, fennel and witlof, cider, mustard emulsion and puffed pork crackle. An almost perfect dish. The pork was extremely tender and the flavour combination was spot on! The puffed pork crackle looked great for presentation but in this respect, I'm a traditional girl - give me a piece of pork crackling any day - I want the real deal! Don't let this put you off this dish though. It's still worth every cent of the asking price.

 
Part of my aim in making an early booking was to ensure we had time for dessert before rushing off to watch the show. This dessert does not disappoint! It's not far off being described as orgasmic! Butterscotch Crème Brulee with green apple and toasted pistachio, a sorbet that lent a touch of bitterness and a smooth mango puree. The crème brulee was silky smooth and melted in the mouth, as a good brulee should. It could stand alone as a dessert and still impress, however set with the other elements on this dish, this dessert is lifted to a whole new level. I'm sitting here salivating as I type - a definite winner and another dish that I highly recommend. It had everything - great taste, great texture and great looks!
 

All in all, we could not fault our first experience at BLACK and will definitely return to taste more from this European and American grill inspired menu.

31 October 2014

Mini Potato Bake

I must confess that I love potatoes and will eat them in just about any form! Potato Bakes are one of the more indulgent ways to enjoy them and when you have a whole dish in front of you, it's hard to stop at just one slice. Hence, here are my mini potato bakes - perfect as individual side dishes for a family dinner and great for portion control. There are many different recipes out there for potato bake but this one is really easy to prepare.
 
I haven't included salt and pepper seasoning but you may add it to potatoes if you wish.
 

Mini Potato Bake

Serves 4

2 potatoes, sliced into thin rounds
1 cup thickened cream
125g tasty cheese
1 piece rindless shortcut bacon, diced into small pieces
Oil spray

1. Spray ramekins with oil.

2. Mix cream and cheese together and set aside.

3. Line base of ramekins with potatoes. It doesn't matter if whole base isn't covered, but do overlap if need be so that majority of base is covered.

4. Pour some of the cream and cheese mixture over the potatoes - about a spoonful will suffice.

5. Repeat steps 3 & 4 until ramekins are almost full.

6. Sprinkle with bacon.

7. Bake uncovered in 180 degrees celcius fan forced oven for approximately 1 hour. I like to have the ramekins on a baking tray so they can be removed easily. Take care not to burn yourself and remember to let the ramekins cool a little before placing them on a child's plate.

3 October 2014

Raspberry Granita

The recent warm weather in Sydney has called for some icy treats - and this raspberry granita is a winner. The great thing about making your own granita is that you can control the amount of sugar you put in it! You can also substitute the raspberry with any fruit you have on hand.


Raspberry Granita

Serves 2

25g raw sugar (or icing sugar if not using a Thermomix)
50g frozen raspberries
100g ice cubes

1. Simply place all three ingredients in Thermomix bowl and blend for 20 seconds/speed 10, gradually increasing speed from 1 to 10.

That's it - very quick and simple!

2 October 2014

Crumbed Ling with Potato Salad

Time for a confession: I think my favourite way to eat fish is battered or fried! Defeats the health benefits but very tasty. This is a recipe using ling fillet, which is similar to perch. With soft, white flesh, it is great for fussy children as well. The recipe can be simplified by using store bought breadcrumbs.
 
The accompanying potato salad is delicious ad a new favourite in this household. I wouldn't really recommend using store bought mayonnaise because the secret to its charm is the homemade dressing.

I use my Thermomix to prepare the crumb for the fish, to hard boil the eggs, steam the potatoes and make the dressing. However, you can complete these steps using your stove top and other appliances.

 
Crumbed Ling with Potato Salad
 
Serves 4-6
 
Fish
 
600g Ling fish (or similar)
6 bread slices
Grated rind of 1 lemon
Salt & pepper to taste
1.5 teaspoons of Mixed Italian Herbs
2-3 eggs, beaten
1 cup flour
 
Potato Salad 
 
1kg potatoes
3 hard boiled eggs
3 trimmed and diced bacon rashers
Handful of chopped chives
Salt & pepper to taste
 
Dressing
 
2 egg yolks
1 tablespoon Dijon mustard
1 tablespoon lemon juice
1 garlic clove, crushed
125ml light olive oil
 
1. I always start with the mayonnaise dressing. To make the dressing, place egg yolks, mustard, lemon juice and garlic in the Thermomix (or a food processor). Mix 20 seconds/speed 4.
 
2. Then slowly add oil in a steady stream through top of lid over a period of 1 minute/speed 4. Finally mix for a further 2 minutes/speed 4. Your mayonnaise is now ready and can be set aside in fridge until ready to use.
 
3. Hard boil eggs, peel and set aside.
 
4. Cook bacon over medium heat in a non-stick fry pan until cooked to your liking and then set aside to cool.
 
5. Potatoes can be peeled or left unpeeled if preferred. Chop potatoes and boil or steam until just tender. 
 
6. Once potatoes are cooled to room temperature, combine with chopped hard boiled eggs, bacon and mayonnaise. Sprinkle with chives and lightly mix through.
 
7. Ling is usually sold de-boned and in large fillets. Slice it into serving size pieces and set aside whilst you prepare crumb mixture.
 
8. To make bread crumb coating, combine 6 roughly torn up slices of bread, lemon rind, salt and pepper and mixed Italian herbs in Thermomix and grind 10 seconds/speed 6. Pour into a bowl.
 
9. Coat fish pieces in flour, dip in egg and then coat with bread crumbs.
 
10. Shallow fry the fish in a pan and then serve with the potato salad.


12 September 2014

Green Medley Ricotta Gnocchi

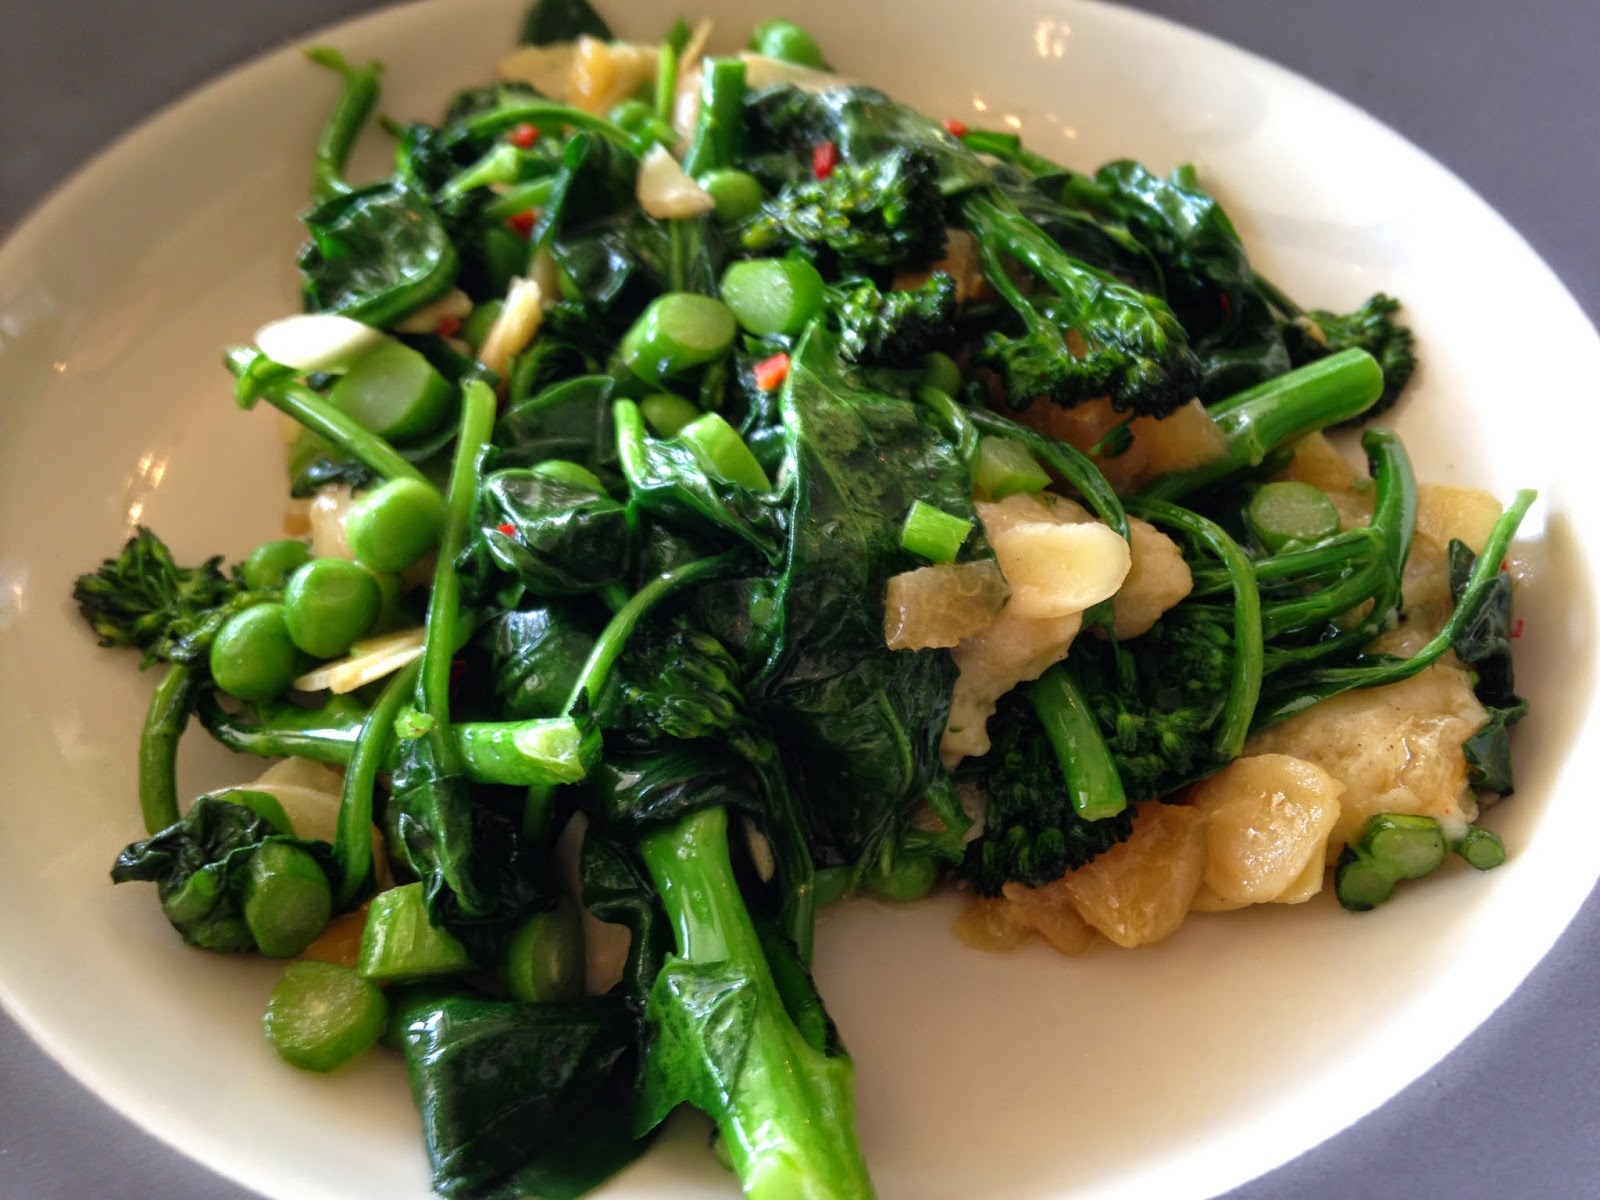
From the moment I got home from Emirates Wolgan Valley Resort and Spa, I was pining for the gorgeous food I had eaten there. One of my favourite dishes was the Tarwin Blue Cheese Gnocchi that we had for lunch. This recipe was inspired by those delicious gnocchi. I think this is my new favourite way to eat gnocchi and all that green makes it seem a little healthier too!

If you haven't got the time to make your own ricotta gnocchi, you can always substitute with store bought gnocchi. However, the ricotta really adds a soft, light texture that compliments the green vegetables well.


Green Medley Ricotta Gnocchi

Serves 6

Batch of ricotta gnocchi 
1 bunch of broccolini
1 small bunch of silver beet spinach
2 handfuls of peas (fresh or frozen*)
Dried chilli
Salt to taste
Olive oil

* If using frozen, take them out of freezer and leave in a covered bowl so that they defrost before you are ready to use them.

1. Steam broccolini and set aside. I used my Thermomix Varoma for this.

2. Cook gnocchi as per recipe directions.

3. As gnocchi are cooking, place chopped/shredded spinach and peas in a pan with a dash of oil and saute over medium heat until wilted and cooked through. Add a little salt to taste.

4. Add the drained gnocchi and continue to saute as you mix through.

5. Next, add the reserved broccolini and toss until heated through, ensuring you keep them as whole as possible.

6. Finally, add as little or as much chilli as you desire. Stir through and serve.


3 September 2014

Emirates Wolgan Valley Resort and Spa

I recently had the privilege of staying at Emirates Wolgan Valley Resort and Spa as a birthday surprise. Go and check out the site because I really can't add enough photos to convey how beautiful and stunning it is. It's not hard to see why Michael Clarke and Kyly Boldy hired out the place for their private wedding a couple of years ago. Housing a maximum of 90 guests in 40 luxury villas, each with its own heated swimming pool, and allowing no outside visitors apart from guests, this is definitely the place to escape the world. With about 90 staff on hand to cater to every whim, a luxury spa and various activities, it's hard not to yearn for the place once you leave.

Being a food blogger and a foodie at heart, I have to say the food at Wolgan Valley is absolutely amazing! Every mouthful is a revelation of ingredients and flavours and each dish has a complex mix of elements. I can't even begin to describe how good the food was, so I will just have to show you in pictures. I was trying to be discreet and took most of these photos using my phone, some in the dimly lit evening dining room. As such, I don't think they do justice to the food. Hopefully, though, they give you a sense of what a six star resort serves. The Wolgan Valley Resort food philosophy is based on seasonal, regional and where possible, organic produce. This is stunningly obvious in every dish. Following is a small selection of what we ate.

Breakfast:

Freshly squeezed orange juice and passionfruit yoghurt.

Fresh fruit.

Eggs Borrodell - Scrambled 'Canobolas' eggs, Borrodell truffle, king brown mushrooms & garlic sourdough.

Sides of Thyme roast field mushrooms & Trunkey Creek smoked bacon.
The Valley Breakfast - free range eggs, Trunkey Creek bacon, truss tomato, basil, spinach & grilled sourdough.
Capertee Sweet Corn Fritter - Cured ocean trout, poached egg, mild chorizo, saffron and coriander.

Lunch:

The Valley Burger - Shogun Wagyu patty, truss tomato, Princess Pantry relish & Braidwood aioli.
Wolgan Caesar Salad - Quattro Stelle prosciutto, baby cos, sourdough crisp & classic dressing.

Tarwin Blue Cheese Gnocchi with chilli, broccoli, almonds and fine herbs.


Dinner:

For dinner, we had the choice of ordering from the a la carte menu or from the daily changing degustation menu, and dishes could be interchanged from each menu. Theses dishes were difficult to photograph because we ate in the gorgeous fire lit dining room but here is a small selection of what we indulged in.


Each meal began with a delicious taster to activate the palate. I can't quite remember what this one was but I can tell you that it was delicious!

Yellow Fin Tuna - sweet soy, cashew & shallot crumble, nashi pear & parsley.

One of the mid-meal palate cleansers - Orange Mountain Ver jus Sorbet.

Millthorpe Pork - Loin, belly, hock, morel mushroom & garden pea.

Desserts & Snacks:
My birthday dessert: a combination of ice-cream, biscuit and crumble presented in an ice sculpture dome.
 
Bilpin Apple Tart Tatin - Wolgan sorrel, Olsson's salted caramel and Garret quince.

Zokoko Chocolate Fondant - brandy snap tuile, green bean coffee and butter milk ice cream.
I'm salivating just typing out the names of these desserts and dishes. There were other amazing ones that I didn't even get the opportunity to photograph, like the Heston Blumenthol-esque white chocolate dome that collapsed into itself once syrup was poured over it to reveal a hidden treasure chest of candied nuts, chocolate and rhubarb presented in a variety of ways. Oh, heaven!

Compliments to the amazing chefs at Wolgan Valley Resort - I would honestly return just for the food! 

27 August 2014

Crumbed Haloumi with Cranberry Sauce

This is a delicious starter to any meal, and makes for a nice snack as well when you are feeling like indulging. Not quite finger food, as the cheese can tend to break when dipping it into the sauce - best to eat it with a fork and knife. Really yummy and definitely a flavour combination I love!

I made the cranberry sauce using my Thermomix but you can do so on the stove top or even cheat and buy some ready made cranberry sauce.


Crumbed Haloumi with Cranberry Sauce

Makes approx. 16 pieces

Cranberry Sauce
100g dried cranberries
10g caster sugar
85g water

Crumbed Haloumi
180g block of Haloumi cheese
1-1.5 cups of breadcrumbs
Salt and pepper to taste
1-2 eggs
Oil

1. To make the sauce, combine cranberries, sugar and water in Thermomix and cook for 8 minutes/100degrees/speed 2. Scrape down sides.

2. Mix for 10 seconds/speed 6. If you feel it needs more water, you can add some more and cook again for 1 minute/100 degrees/speed 2. When happy with consistency, set aside to cool.

3. Beat eggs in one bowl and set aside.

4. Pour breadcrumbs into another bowl and season lightly with salt and pepper.

5. Slice Haloumi into approximately half centimetre pieces.

6. Dip Haloumi pieces into egg and then into breadcrumbs to coat.

7. On medium heat, shallow fry Haloumi pieces until a light golden brown in colour.


18 August 2014

Roasted Hazelnut and Cranberry Dark Chocolate Bark

 Tempering chocolate is probably one of those things I would never have attempted....anything that involves getting chocolate to a certain temperature sounds tricky. I watched contestants on reality food shows attempt it plenty of times, sometimes with stunning success and sometimes with disastrous results. I know that chocolate once tempered has to be thin, glossy and that you should hear a "snap" when breaking it.

This is the closest I have come to tempering chocolate - using my Thermomix! I've had both "good" and "better" results and in this process I've learned that the most important aspect of tempering chocolate (apart from the temperature), is the need to work quickly!

This recipe is for the hazelnut and cranberry version but I've also made it with dried apricots and a mix of other nuts. I've also made a kid friendly version as can be seen in pictures below. You can basically use anything that takes your fancy - be as creative as you like!

If you don't have a Thermomix, you can still certainly try this recipe - either by using a thermometer and getting the chocolate to required temperatures or by creating a thicker, non-tempered version.


Roasted Hazelnut and Cranberry Dark Chocolate Bark 

125g hazelnut kernels
80g dried cranberries
200g dark baking chocolate


1. Line a baking tray with baking paper or foil and set aside.

2. Chop hazelnuts for 5 seconds/speed 5. Set aside and clean bowl.

3. Dry roast hazelnut pieces in a fry pan on stove top for a couple of minutes, then set aside ready to use.

4. Roughly chop cranberries to desired size. I did this by hand.

5. Place 150g of the chocolate in broken up pieces into the Thermomix. Chop for 5 seconds/speed 9. Scrape down sides of bowl if necessary.

6. Melt chocolate for 4 minutes/50 degrees/speed 2. Scrape down sides if required.

7. Immediately add remaining 50g of chocolate in broken up pieces and melt for 1 minute/speed 2. Do not select a temperature. It will have come down to the required temperature on its own.

8. This is where you need to work really quickly before the chocolate cools and sets. Pour it onto your pre-lined baking tray and using a knife or spatula, spread it out thinly. Then sprinkle with the hazelnuts and cranberries.

9. Place tray in fridge for 30 minutes or until set. Once set, you can break it up ready for serving. 

A kid-friendly version topped with Hundreds and Thousands as well as broken up M&Ms.


A mixture of the two above once broken up. You can see how thin the chocolate is!
The first one I ever made: dried apricots, cranberries & mixed nuts.

Yet another version with slivered almonds and cranberries.

15 August 2014

Carrot & Walnut Cupcakes with Cream Cheese Frosting

Sometimes all you need are cupcakes...and when they are as delicious as these carrot and walnut ones, you'll find it hard to stop at just one.

I have included both Thermomix and traditional recipe details for this one because it's just too good not to share with everyone. They just melt in your mouth. Hope you enjoy!


Carrot & Walnut Cupcakes with Cream Cheese Frosting

Makes 12

Cupcakes

50g (or 1/2 cup) walnuts
210g (or 3-4 whole) baby carrots*
130g (or 1 cup) plain flour
1 teaspoon baking powder
1 teaspoon bicarbonate soda
1 teaspoon ground cinnamon
1 teaspoon salt
130g (or 2/3 cup) light olive oil
120g (or 2/3 cup) caster sugar
2 eggs

* Once grated, you should have 1 1/2 cups if using traditional recipe.

Frosting

60g cream cheese (I use Philadelphia)
30g butter, softened
1/2 teaspoon vanilla essence
50g (or 3/4 cup pure icing sugar)

1. Chop walnuts. If using a Thermomix, chop for 4 seconds/speed 4. Set aside.

2. Peel and grate carrots. If using a Thermomix, peel and roughly chop into thirds. Then grate/chop for 10 seconds/speed 9. Set aside.

3. Sift flour, baking powder, bicarbonate soda, cinnamon and salt into bowl. If using a Thermomix, simply measure into bowl and mill for 10 seconds/speed 9.

4. For those working without a Thermomix, combine oil, sugar and eggs in a separate bowl and then mix the two lots together until well combined. Thermomix owners, add oil, sugar and eggs directly to bowl with other ingredients and mix for 20 seconds/speed 5.

5. Add previously set aside walnuts and carrot to the mixture and blend well. Thermomix users, mix for 20 seconds/speed 5.

6. Spoon mixture into individual cupcake cases and bake in 180 degree Celsius fan forced oven for approximately 20 minutes or until cooked through.


7. For the frosting, place cream cheese, butter and vanilla in a bowl and beat until pale. Thermomix users, place cream cheese, butter and vanilla in bowl and whip for 20 seconds/speed 3.5.

8. Gradually add icing sugar until combined. Thermomix users, add icing sugar and beat for 10 seconds/speed 4. Scrape down sides and repeat.

9. Once cupcakes have cooled, pipe a dollop of the frosting onto the centre of each one. If you want the tops of cupcakes completely covered, you will need to double the frosting recipe.

30 July 2014

Mini Mexican Empanadas

These mini empanadas are great as part of a Mexican feast, and make for great party food no matter the theme. I've had the recipe for many years and am not sure of its origins.

You can cut the pastry into larger pieces and hence make fewer but larger empanadas if you wish.

The empanadas in the foreground, pictured with Old El Paso's Stand 'n' Stuff Tortillas.

Mini Mexican Empanadas

Makes approx 36

Olive oil
250g beef mince
1 small onion, chopped finely
1 clove garlic, crushed
1/2 teaspoon chilli powder
1 small green capsicum, diced finely
200g tinned tomatoes (or 200g homemade Italian tomato sauce)
1/4 cup water
1 beef stock cube (or 1/2 teaspoon Thermomix vegetable stock)
150g tinned red kidney beans
Salt and pepper to taste
4 sheets of puff pastry (I use Pampas)
Egg for glazing

1. Brown the beef mince in a saucepan, using a little olive oil, ensuring that all lumps are broken up.

2. Add onion and cook until tender. 

3. Add garlic and chilli powder and cook for a further minute, stirring all ingredients together. You can add more chilli powder if you like your empanadas hot.

4. Add capsicum and tomatoes/tomato sauce and mix well.

5. Dissolve stock cube or vegetable stock in the water and then add to saucepan, along with salt and pepper to taste. Bring mixture to the boil and then reduce heat, letting it simmer gently for about 30 minutes with the lid on.

6. Remove lid and let mixture continue to simmer gently for a further 15 minutes. Then set aside to cool.

7. Once mixture is cooled, add your kidney beans and mix them in.

8. Cut each pastry sheet into 9 small squares.

9. Take one square at a time, add approximately a teaspoon of the mixture to the centre, glaze edges of pastry with beaten egg, then fold in half so that you have a triangular shape. I then use the back of a fork to press the edges together.

10. Place triangles on a lined baking tray and bake in a 180 degree Celsius fan forced oven for about 20 minutes or until puffed up and golden brown. Alternatively, you can deep fry the empanadas but I prefer oven baked for this recipe.


28 July 2014

Crispy Chicken Tortillas

These easy Crispy Chicken Tortillas are great for a mid-week dinner or a school/work lunch. There aren't many lunch ideas that get the thumbs up from my boys, but this one is a winner. I'll make these for dinner and then use the leftovers for their lunch the following day.

I usually add tomato, and even avocado sometimes, but I didn't have any on hand the day I made these ones. You can vary the sauce as well (my boys prefer tomato sauce).

The tortillas are store bought because during the week you want quick and easy options!

The Thermomix recipe for the flour and spice coating on the chicken can be found here. If you feel the mix is too spicy, simply adjust quantities or add more flour. I added more flour, but even without the addition, the recipe makes enough for a few dinners. Therefore, once mixed, set some aside in an airtight container or zip-lock bag so that it can be used at a later time. I can't stress this enough! You don't want to waste any.

This flour and spice coating can also be used for popcorn chicken. I would only recommend the popcorn chicken version if making a small amount as it is quite fiddly. It is nice to shallow-fry for the popcorn chicken, replicating the famous fast food version, however I usually oven bake the larger pieces of chicken.


Crispy Chicken Tortillas

Serves 4-6

2 eggs, beaten
4 skinless, boneless chicken thighs*
Oil
Tortillas (I use Old El Paso brand)
Lettuce, shredded
Cucumber, diced
Tomato (optional)
Avocado (optional)
Tasty cheese, shredded
Sauce of choice eg mayonnaise

* I use chicken thighs because they are so tender, however you can use any cut of chicken you like. I've used tenderloins with success and the original recipe uses breast. With chicken thighs, I usually clean them of excess fat and then cut them into about 3 pieces each.

Coating**
2 tablespoons salt
1 1/2 tablespoons of black peppercorns
1 1/2 tablespoons dried onion flakes
1 tablespoon dried garlic
1 tablespoon dried rosemary
1/2 tablespoon dried basil
1/2 tablespoon paprika
1/2 tablespoon dried oregano
1/2 tablespoon mustard seeds
1 teaspoon dried thyme
1 teaspoon dried tarragon
350g plain flour

** All the spices can be found in the spice section of major supermarkets.

1. Grind all herbs and spices either by hand or using a spice grinder until you have a fine powder.

2. Add flour and mix well. You may like to complete this step using a food processor, thereby replicating the consistency gained by blitzing in a Thermomix. Once you've done this, taste your flour mix and add more flour if you wish to lessen the spiciness. It will be slightly less spicy once cooked so if you wish to be super accurate, you can fry off a small coated piece of chicken to test whether it is to your taste.

3. Pour some of the flour into a plate, remembering to reserve some for another time. It's better to put less in the plate and add to it if needed than to waste your coating. You can't reserve leftover coating in the actual plate as it will be contaminated by the egg and chicken.

4. In terms of the chicken, this is the important part - double coating! It's the double coating that gives the chicken crispiness and makes it a good replica of the take away version. So, dip your chicken pieces into your beaten egg, then coat with the coating mixture and then repeat.

5. Once all your chicken has been double coated, you can either shallow fry on a medium heat on your stove top or place in a 180 degree Celsius oven until cooked (the time will depend on the size and thickness of your chicken pieces - just keep an eye on it and remember to turn chicken over half way through).

6. All that's then left to do is assemble your tortillas with your choice of fillings and sauce.


24 July 2014

Rustic Mini Apple Pies

I love apple desserts and this one came about a little by accident. The pastry is from the Thermomix Everyday Cookbook and the filling is my own. It seems really sweet when you look at the ingredients and even tastes a little sweet when you mix it all together, however, once baked, it is great! I actually started off making something else but ended up with these wonderful little apple pies. They can be eaten warm with ice-cream but I think they taste great cold as well.

I did mix the dough and cook the apples using my Thermomix, however these can still be made without one. Of course, if you want to cheat, you can just use store bought shortcrust pastry and apples from a tin!


Rustic Mini Apple Pies

Makes 12

Pastry
110g raw sugar (if making without Thermomix, just use caster sugar)
120g butter, softened*
1 teaspoon vanilla paste
2 egg yolks
300g plain flour
3 tablespoons iced water

* If you forget to take butter out beforehand, you can soften it using microwave or just slice thinly as you add to TM.

Filling
6 apples, peeled, cored & roughly chopped**
40g butter,melted
1 tablespoon custard powder
1/4 cup caster sugar
1/4 cup brown sugar
1 teaspoon cinnamon

** I used Granny Smith apples but you can try other varieties as well. I understand that Golden Delicious work great too.

Assembly
Cooking oil spray
1-2 tablespoons milk
1 tablespoon caster sugar
1 teaspoon of cinnamon


Pastry
1. Place raw sugar into Thermomix bowl and mill for 10 seconds at speed 9. A friend gave me a handy tip for eliminating the dust cloud that is normally evident when milling - just place a paper towel between the lid and measuring cup as shown in the picture below.


2. Add your butter, along with the vanilla and the egg yolks and mix for 3 minutes speed 4. Scrape down sides of bowl if necessary at the end.

3. Add the flour and water and mix for 2 seconds speed 7 and then knead your dough for 1 minute (closed lid and wheat symbol).

4. Finally, remove the dough from the bowl and wrap it in some cling wrap. Place in fridge for at least 30 minutes.

Filling
1. Fill Thermomix bowl with about 500g water. Place roughly chopped apple into Varoma tray and place Varoma into position. Steam apples for 10-15 minutes on Varoma  Speed 2, or until apples are tender. Then set aside to cool. I chopped them up a bit more and placed them in a bowl that was slightly submerged in cold water in order to help speed up the cooling process.

2. Once cooled, add melted butter, custard powder, caster sugar, brown sugar and cinnamon and mix together until well combined.

Assembly
1. Once you are ready to work with your dough, you need to do so quickly before it softens too much. Roll the dough out between two pieces of baking paper until it is approximately 3mm in thickness - you can separate it and roll it out in two or 3 lots if you wish. Don't worry too much about the thickness - basically you just want it rolled thinly but not too thinly that it can't be picked up or filled without breaking.

2. Once rolled out, cut out circles about 8.5cm in diameter. I just used a glass for this. 

3. Spray a cupcake/muffin tin with cooking oil spray, ensuring sides and bases are all coated. Then press each circular piece of dough into one of the cupcake holes. Take care not to tear the pastry around the lower edges. However, the top edges can be a bit rustic. Mine didn't come all the way up to the top.

4. Place spoonfuls of apple mixture into each mould until full.

5. Roll out leftover dough and cut small strips out, using these to decorate top. This recipe is rustic and quick so I just used two strips crossing each other. If you want to make your pies look prettier, you can weave some strips or even use a cookie cutter and make a nice shape to sit on top.

6. Finally, just brush strips with milk and sprinkle with combined caster sugar and cinnamon.

7. Bake in pre-heated oven for approximately 20 minutes at 180 degrees Celsius fan forced. Allow to cool for about 5-10 minutes then carefully remove and either serve with cream or ice-cream or place on a cooling rack to finish cooling. Enjoy - they're yummy!


21 July 2014

Smashed Peas & Zucchini

This is a quick and easy side dish that I served with "bangers and mash" last week. As always, if you don't have a Thermomix, you can still make this dish - just steam the peas and zucchini and then proceed to "smash and dress".


Pea and Zucchini Smash

300g fresh or frozen baby peas
1 zucchini chopped into quarters
2-3 slices prosciutto
1/2 lemon
Salt & pepper


1. Place peas and zucchini in Thermomix bowl and cook for 10 minutes using the Varoma function, making sure that both the reverse function and the wooden spoon stirring function are selected.

2. Whilst the peas and zucchini are cooking, chop prosciutto up finely and dry roast in a frying pan for a few minutes so that it crisps up.

3. When Varoma has finished, mix for 5 seconds on speed 4. This will create the smashed effect you are after.

4. Finally, just spoon into a dish, season with salt and pepper and a squeeze of lemon juice to your taste. Then garnish with the prosciutto.


Served with barbequed pork sausages and mash potato